SPF, DKIM & DMARC: Cold Email Auth Explained
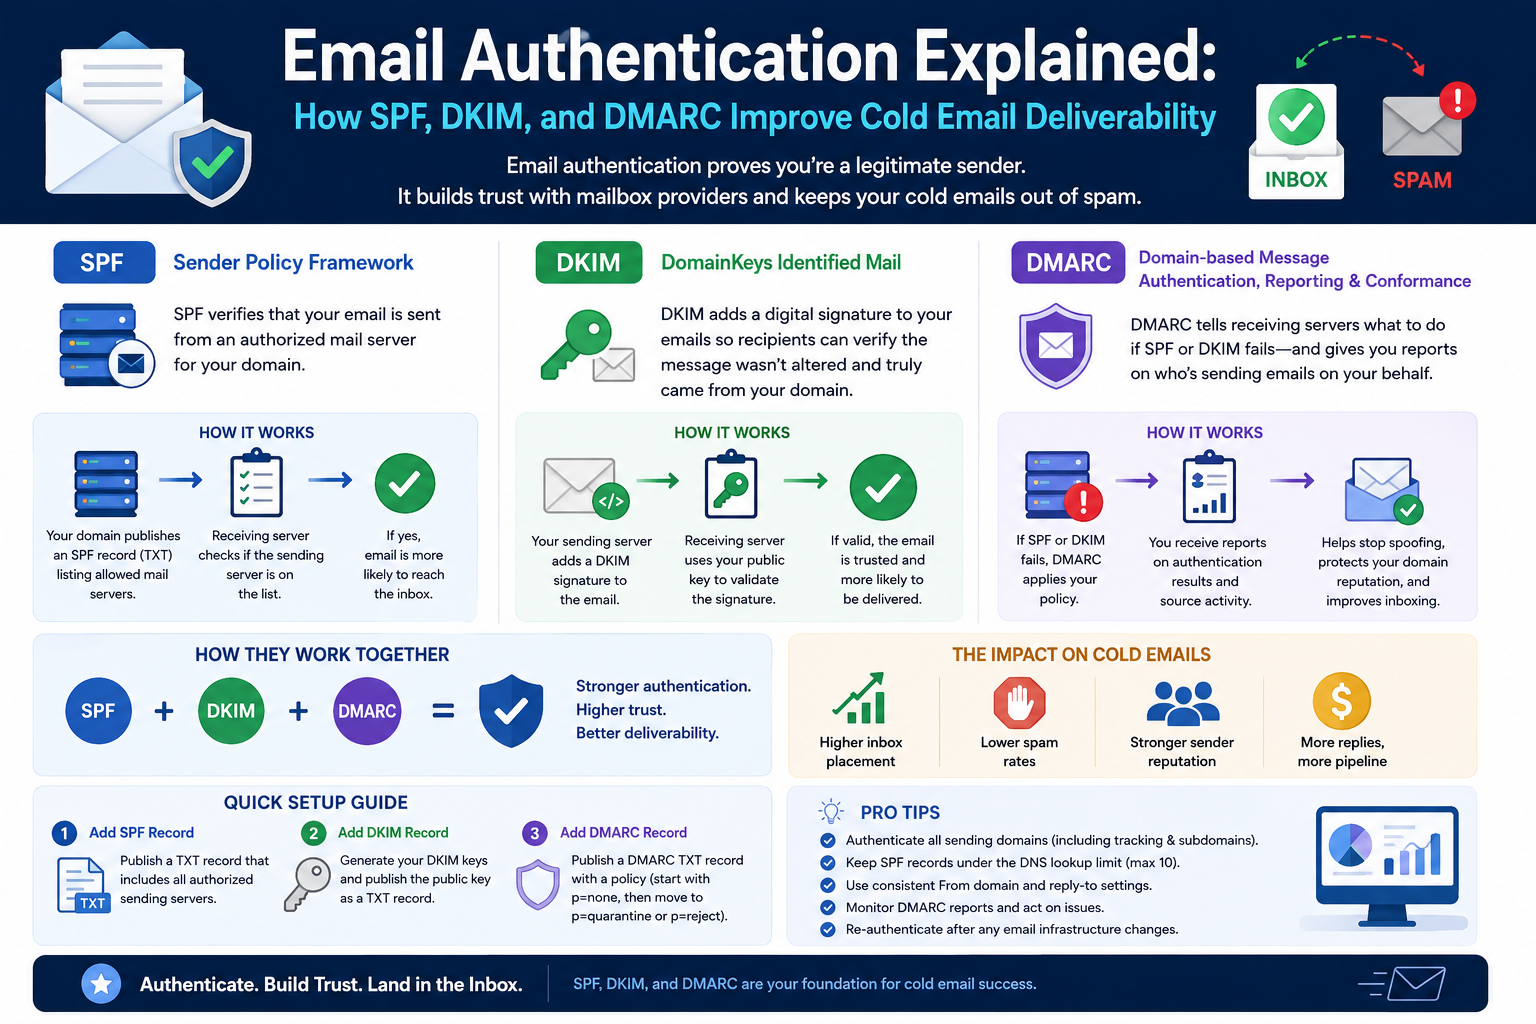
SPF, DKIM, and DMARC: Cold Email Authentication Explained
If your cold emails are landing in spam, your copy probably isn't the problem. Missing or broken authentication is one of the most common — and most fixable — causes of poor inbox placement. Here's exactly how SPF, DKIM, and DMARC work, why all three matter, and what to check before you send a single outbound email.
Why Authentication Is the First Thing to Fix Before You Send
Mailbox providers can't see your face. They can't verify over the phone that you are who you claim to be. Authentication records are how they verify it programmatically — and if those records are missing or misconfigured, providers have no technical basis to trust your email.
SPF, DKIM, and DMARC are the three DNS records that make up the modern email authentication framework. Each one answers a different question about your email's legitimacy. Together, they give Gmail, Microsoft, and other providers enough signal to decide whether your message belongs in the inbox or the spam folder — before they even evaluate your subject line or copy.
The chain matters. Passing one record while failing another leaves meaningful trust gaps. A domain with SPF but no DKIM is easier to spoof. A domain with both SPF and DKIM but no DMARC gives providers no instructions on what to do when something goes wrong. All three need to be in place and passing before you launch any cold email campaign.
SPF: Tell Providers Which Servers Can Send on Your Behalf
SPF (Sender Policy Framework) is a DNS TXT record that lists every server authorized to send email on behalf of your domain. When a receiving mail server gets an email from you, it checks your SPF record to confirm the sending server is on the approved list. If it is, SPF passes. If it isn't — or if no SPF record exists at all — the message fails verification and your spam risk increases immediately.
The record itself is straightforward. For a domain sending through Google Workspace, it looks like this:
v=spf1 include:_spf.google.com ~all
The include: directive pulls in Google's list of authorized sending IPs. If you're also using an outreach platform to send, that platform's SPF entry needs to be in the same record too.
Two mistakes kill SPF more than anything else. First, leaving out a sending platform — if your outreach tool sends on your behalf and isn't listed in your SPF record, those emails will fail verification. Second, publishing multiple SPF records — a domain is only allowed one. Two records don't stack; they break each other. Combine everything into a single record and audit it every time you add a new tool to your sending stack.
DKIM: Prove Your Emails Haven't Been Tampered With in Transit
DKIM (DomainKeys Identified Mail) adds a cryptographic signature to every outbound email. When the receiving server gets the message, it retrieves your public DKIM key from DNS and uses it to verify the signature. A DKIM pass means two things: the email was authorized by your domain, and the content was not altered after it left your server.
That second point matters more than most people realize. Without DKIM, a bad actor could potentially intercept and modify an email in transit without detection. With DKIM, any modification breaks the signature — and the receiving server knows something is wrong.
The most common setup mistake is assuming DKIM is active because you generated the key. Most providers, including Google Workspace, generate the DKIM key during setup but require you to manually enable signing as a separate step. If you skip that step, DKIM fails silently — your record exists in DNS but no signatures are being attached to your outgoing mail. Always verify that DKIM returns a pass in the email headers of a real sent message, not just that the DNS record is present.
DMARC: Set the Rules for What Happens When Authentication Fails
DMARC (Domain-based Message Authentication, Reporting, and Conformance) is the policy layer that sits on top of SPF and DKIM. It tells receiving servers what to do when an email fails authentication — and it introduces a critical concept called alignment.
There are three DMARC policy levels:
- p=none — Monitor only. Providers collect data but don't take action on failing messages. This is where every new domain should start.
- p=quarantine — Treat failing messages as suspicious. They may be delivered to spam folders.
- p=reject — Reject failing messages entirely. The strictest protection against spoofing.
Start at p=none and stay there for at least two weeks while you monitor aggregate reports. Those reports show you which servers are sending on behalf of your domain — including any you didn't authorize. Once you've confirmed your legitimate sending infrastructure is authenticating correctly, move to p=quarantine, then eventually to p=reject.
DMARC also provides reporting through the rua= tag. Set this to an email address you actually check. The reports aren't always easy to read in raw form, but they'll surface configuration problems and unauthorized sending activity that you'd otherwise miss entirely.
How the Three Records Work Together to Build Provider Trust
Each record handles a different layer of verification. SPF answers the question: "Is this server authorized to send for this domain?" DKIM answers: "Was this message authorized and left unchanged?" DMARC answers: "Do SPF and/or DKIM align with the domain the recipient actually sees in the From field — and what should happen if they don't?"
That alignment check is the part most people overlook. DMARC requires that the domain authenticated by SPF or DKIM matches the domain visible to the recipient. If your email shows john@companyhq.com in the From field but authenticates through a different domain behind the scenes, DMARC alignment fails — even if SPF and DKIM both pass individually.
Providers like Gmail and Microsoft evaluate all three records simultaneously. [unverified] Whether Gmail or Microsoft weights any single authentication record more heavily than the others isn't publicly documented. What is documented is that consistently passing all three builds cumulative trust over time, while gaps in any one record reduce your overall sender credibility. Think of it less like a checklist and more like a trust signal — the more consistently you pass, the more providers have reason to route your emails to the inbox.
A Pre-Send Authentication Checklist Every SDR Should Run
Run through this before launching any new sending domain or campaign. It takes less than 15 minutes and prevents weeks of deliverability problems.
SPF
- A single SPF record exists for your sending domain (not two or more)
- Every platform in your stack is included — Google Workspace or Microsoft 365, plus your outreach tool
- SPF returns a pass when you send a test email and check the headers
DKIM
- DKIM is enabled and actively signing outbound mail — not just generated
- DKIM returns a pass in the headers of a real sent message
- If you've recently migrated providers, your old DKIM records have been updated or removed
DMARC
- A DMARC record exists with at minimum
p=none - A
rua=address is set so you receive aggregate reports - You've monitored reports for at least two weeks before moving to
p=quarantine - Enforcement (
p=reject) is only enabled once all legitimate sending infrastructure is confirmed to be authenticating correctly
Ongoing hygiene
- Run a full DNS health check every time you add a new sending domain
- Re-audit SPF whenever you add a new outreach platform or email provider to your stack
- [unverified] Verify authentication pass/fail status inside email headers — for non-technical SDRs, a tool like MXToolbox or a deliverability testing platform can simplify this step considerably
Authentication isn't a one-time setup task — it's infrastructure you actively maintain. Get it right before your first send, and audit it every time something in your stack changes.